OAuth Integration
Integrate Payman’s OAuth to securely access APIs using Client Credentials or Authorization Code flows.
Why Use OAuth?
Payman’s OAuth system allows your application to securely request and manage access to wallets, payees, and transactions — either for your own account or on behalf of your users. It supports both:- Client Credentials Flow — for apps that automate actions using your own Payman resources (e.g. agent-based automation or backend apps).
- Authorization Code Flow — for apps that connect to end users’ wallets via OAuth, with granular permissions and full user consent.
Getting Started
Step 1: Request Developer Access
To begin using OAuth:- Request an invite to Payman.
- Once approved, you’ll receive an invite code.
- Use the invite code to register on the Payman Dashboard.
- Navigate to the Developers section and register your application.
Step 2: Get Your Credentials
After registering your app, Payman provides two sets of credentials:-
Test Credentials (auto-created):
- Works with test wallets (TSD) and test payees
- You’ll also get:
- A TSD test wallet (with 1000 TSD)
- A default test payee
- A default policy for spend control
-
Live Credentials (approval required):
- Enables real payments with USD and USDC wallets
- Requires KYC and policy approval
Authentication Methods
Payman supports 3 OAuth-based authentication strategies depending on your use case:1. Client Credentials Flow (Machine-to-Machine)
This method is ideal for backend apps or AI agents that need to access your own resources (e.g., wallets or payees created under your account). You’ll use your app’s Client ID and Client Secret to request a token.2. Authorization Code Flow (OAuth with End Users)
Use this when your app needs to access another user’s wallets or payees via OAuth. It involves:- Redirecting users to a Payman consent screen
- Users grant specific permissions (scopes)
- Your app receives an authorization code
- You exchange the code for an access token
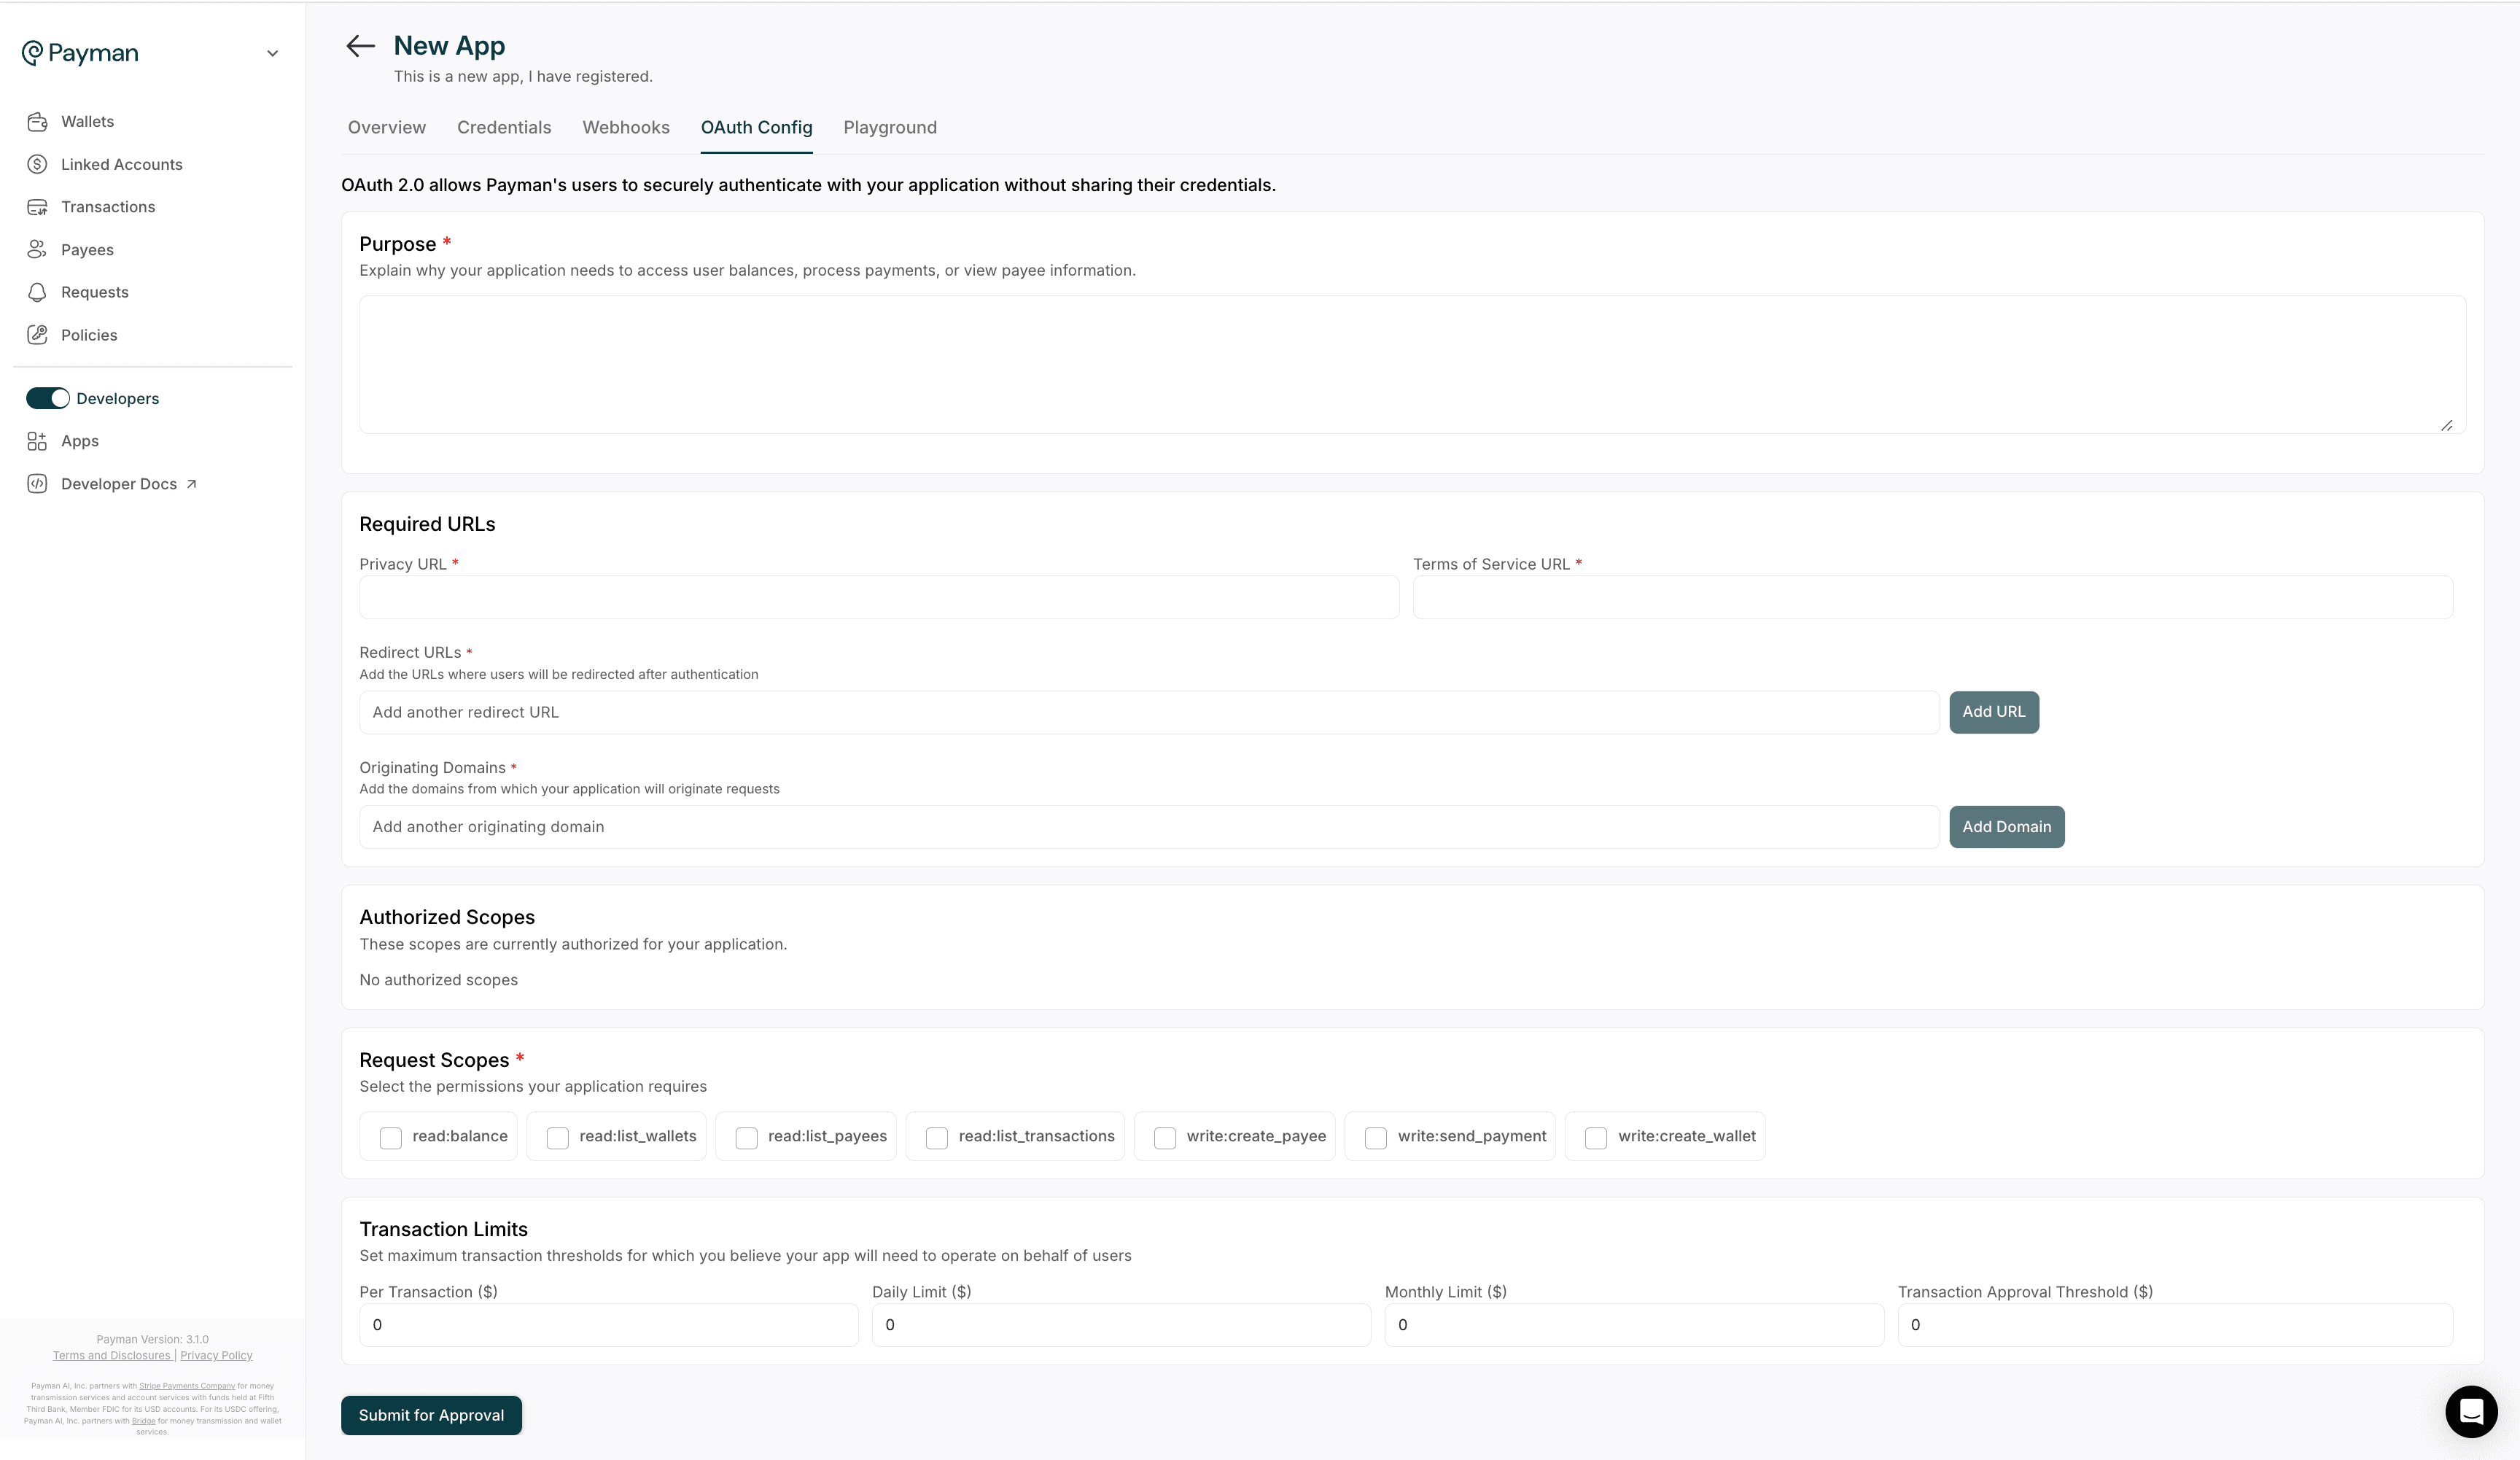
OAuth Configuration Requirements
When registering an app for OAuth, you must provide:| Field | Description |
|---|---|
| Purpose | Why your app needs access |
| Redirect URIs | Where the user is redirected after granting access (max 5) |
| Origin Domains | Allowed domains for your frontend (max 5) - Make sure you add https://app.paymanai.com/ as one of the originating domains |
| Scopes | Which permissions you’re requesting |
| Transaction Limits | Maximum allowed per transaction |
Available OAuth Scopes
Each scope grants your app specific capabilities:| Scope | Permission |
|---|---|
read_balance | View wallet balances |
read_list_wallets | View list of connected wallets |
read_list_payees | View all existing payees |
read_list_transactions | View wallet transaction history |
write_create_payee | Create a new payee |
write_send_payment | Send money to an existing payee |
write_create_wallet | Programmatically create a new wallet |
Integrating OAuth
Step 1: Add the Payman Connect Button
Use the following script to add a customizable OAuth connect button to your site or app. This button launches the OAuth consent flow. Users are prompted to grant access to their Payman wallets and approve your requested scopes.Add more data-scopes as needed, always separate them with commas without spaces.
| Attribute | Description | Required |
|---|---|---|
data-client-id | Your client ID | Yes |
data-scopes | Requested scopes | Yes |
data-redirect-uri | Redirect after auth | Yes |
data-target | Where to inject button | Yes |
data-dark-mode | Dark mode toggle | No |
strategy | Script loading strategy | No |
data-styles | Custom styles | No |
Step 2: Handle OAuth Callback (Frontend)
Once the user authorizes access, Payman will redirect back to your specifiedredirect_uri with an authorization code.
Use the provided code snippet to:
- Extract the code from the redirect URL
- Send it to your backend for secure token exchange
⚠️ Security Note: Never exchange OAuth codes in frontend code. Always pass them to your backend to handle token exchange securely using your client secret.
Step 3: Token Exchange (Backend)
Your server will exchange the auth code for an access token using the client credentials. This token gives your app permission to act on the user’s behalf for the scopes granted.
✅ Tokens expire — always track the expiresIn and refresh if needed.
Method 3: Direct Access Token Method
This is useful in mobile development environments like React Native, or if you’ve already obtained an access token through other means (e.g. Playground, backend exchange). You simply initialize the SDK using the existing token.🚫 Warning: Never hardcode or expose access tokens in frontend web apps. Use environment variables or secure storage.
Testing Your Integration
Use your test credentials during development:- Simulate requests with test wallets (TSD)
- Use Playground in the Dashboard to validate your app setup before building
- Perform OAuth flows using a test Payman account
Testing Snippets
Best Practices
- Use test mode in development
- Never expose client secrets in frontend code
- Always handle OAuth errors gracefully
- Store and refresh tokens securely
- Request only the scopes you need
- Use env variables for secrets
- Monitor token expiry
- Cache tokens appropriately
Need help? Reach out to [email protected]